This is what met desk, in slightly cleaner times, looks like
right now.

First a review of the Ikea SKARSTA Sit/Stand Desk and then a
detailed assembly.
As a desk it works great. Despite have two monitors and a
lamp all weighted to one side of it there is little or no tilt even when
lifting the desk to max height. The surface seems fine, if not particularly to
my style. And, having bought the larger of the desk surfaces for this there is
quite a lot of real estate. The metal frame is solid and works great.
My only complaint about the desk is that when cranking it
up, it makes an awful racket. My wife’s is much quieter, but still noisy as you
get toward the top of its extension.
As you can see, I use two desks that my dad and I built long
ago to give me a nice surround surface and place storage and peripherals.
Now into construction and assembly.
Tools used for normal assembly were a Philips head screwdriver,
a wrench (whose size escapes me at the moment, the included hex keys, and
sleeve, a rubber mallet, and white lithium grease.

Unfortunately on the day we went to Ikea the store only had
one of the SKARSTA tops of the desired dimensions available, so we picked out
another desk surface of same dimensions (except thickness) and decided to drill the
holes ourselves. Basically, while not ideal, we didn’t want to pay for
shipping, were moving, and our new place was going to be much less convenient
to access an Ikea from.
Tools for assembly while drilling my own holes further
included carpenter pencil / marker, painter’s tape, C-clamp, glove (as padding
for C-clamp), two different drill bits (necessitated by two different holes) a
drill, an adjustable square, and a tape measure.

The metal frame for this deck is substantial and heavy.
Great for a desk, a bit of a bear for assembly. First, using my wrench and hex
key I put together the main beam.

Torqued them well.

Then you apply these cushioning pads that the desk surface
will rest on.

You then put on the leg. The leg is heavy and awkward. The
holes for the leg, if I recall correctly, were threaded and so there is no need
for nuts to accompany the bolts.

Again, torque these well.

Next you add the support which the desk surface will be
secured to. These were also threaded, so no nuts.

After that it is four bolts for the leg’s foot, which is
both hefty and wide adding stability to the desk.
Make sure to torque these well.

Last step for the legs is to screw in the pads. Keep in mind
these can be backed out for leveling if needed.

Now, with the legs and feet on the floor you add the
connecting rod which connects the lifting mechanism in each leg to one another.
I recommend using white lithium grease on the end.

The connecting rod is composed of two pieces. I used the
white lithium grease on all ends and the middle. You need to put the two rod
pieces together and then extend it while keeping it aligned into the receiving
holes of the lifting mechanism.

Then you screw in the pass through bracket and holding clip
for the cranking rod into the desk surface.

And in order to mount the desk surface you place in these
expanding plastic holders.

They have a pin that pushes out the sides, which I used the
rubber mallet to hit in.

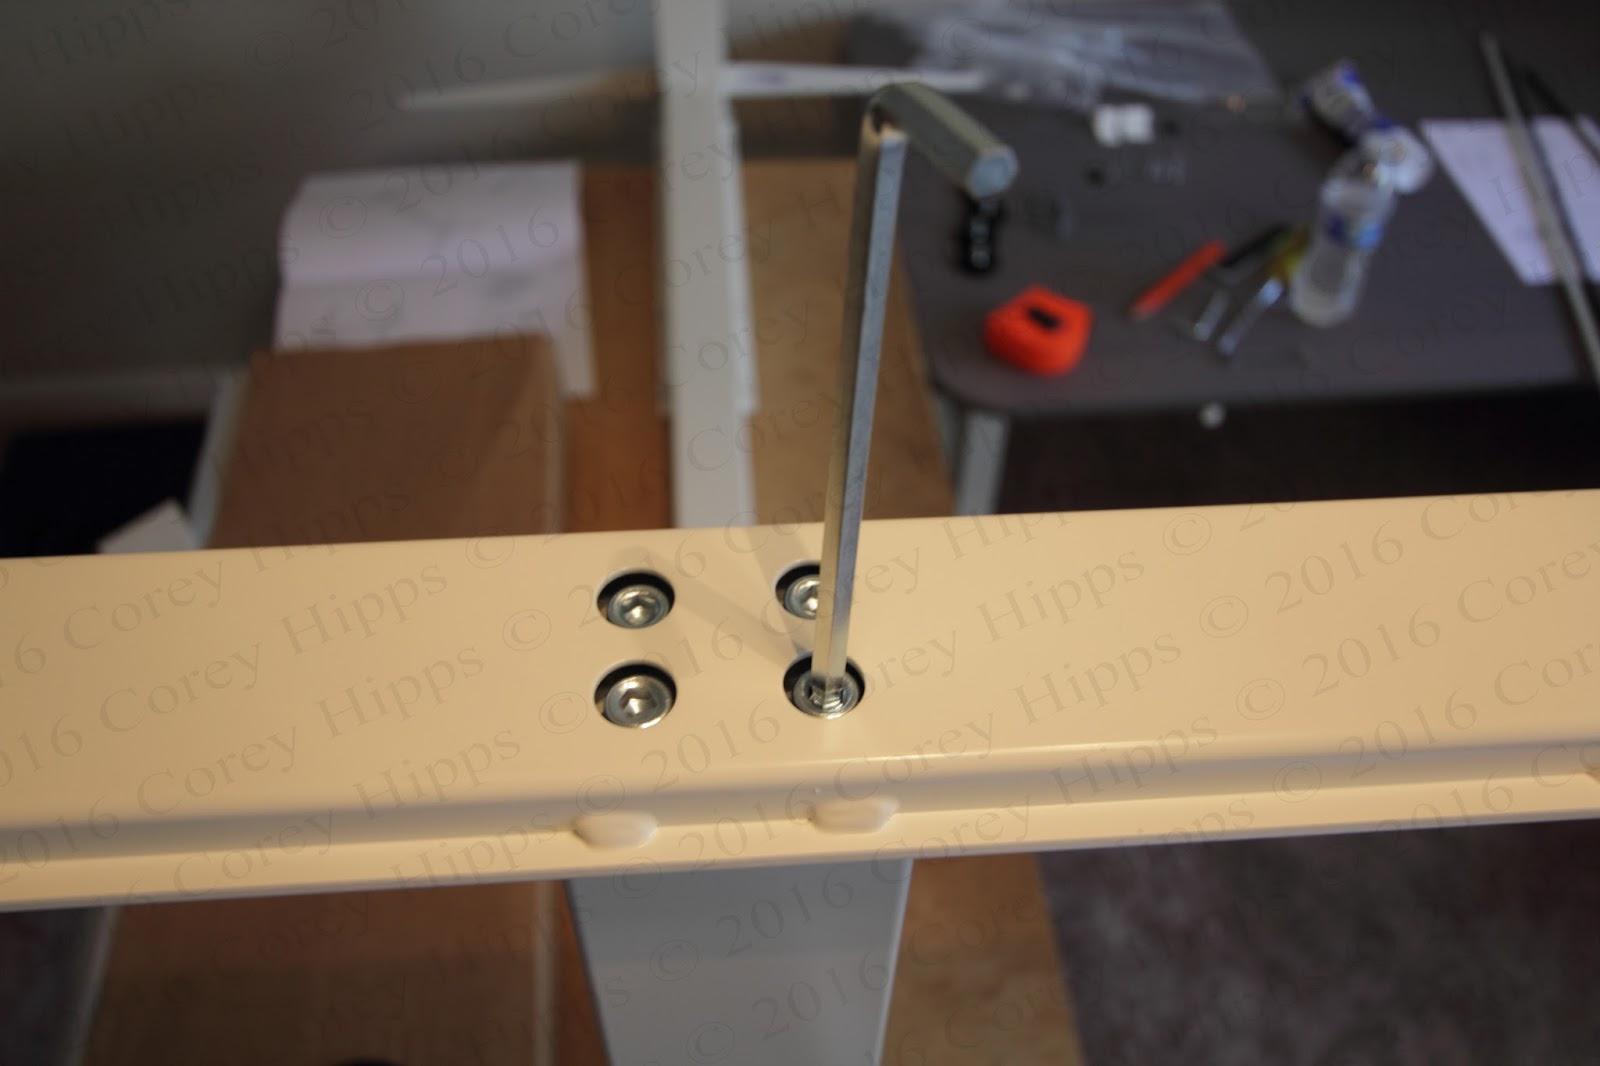
Once everything is assembled you and the cranking rod, I
suggest using white lithium grease here as well. One of the complaints I saw
was that for some people the cranking rod had been scraped over the life of the
desk and it had made stowing the rod difficult as it did not slide back and
forth well. I used white lithium grease because it is water proof and acts as a
lubricant.

Final piece is a retention slip that prevents you from
pulling the cranking rod out of the lifting mechanism.

This is the pre-drilled hole pattern on the bottom of the
SKARSTA desk surface.

As you can see it does not match the second surface we
bought (explanation above), and so drilling was required. I believe the desk surface I had to drill was from an Ikea BEKANT.

Much measuring followed.

And as you can vaguely see I drew a grid using intersecting
lines to determine where the holes needed to be measuring from the pre-drilled
desk surface.

A close up of the grid and markings.

In an ideal world I would have had a drill press. In a less than
ideal world I had painter’s tape.

I started drilling out the necessary holes going no deeper
than the painter’s tape hitting the desk surface.

Unfortunately I was not very good at depth control doing
this free hand and this desk surface was around an 1/8th or 1/4th
inch thinner than the one that is meant to go on the desk, so I ended up
breaking the surface and punching through. I am not particularly good at this.

Here is a picture of the desk at max height. This is great
for working while standing, or gaming. Also great if I need to swap out a
graphics card or power supply on my desktop as I can just crank the desk up and
have plenty of head room.

In the end I have a U and my wife has an L and we both have
an absolutely wonderful amount of work space and really like the office setup.

I am writing this up April 23rd, 2017 but posting
it with the project completion date of September 21st, 2016. I have
some thoughts in further review after long term usage.
I like the legs. I may try and take them apart
at some point and reduce the noise when transitioning between sit and stand.
For the price though this product does exactly what it said it would, does it
well (though noisily in transition). I may very well end up making a much nicer
hard wood desk surface with a better mounting method to the frame and keep this
a good long time. Even without the sit / stand feature this frame is great. So
overall we are both quite happy with the purchase.
As always, questions and comments are welcome and I am glad to answer to the best of knowledge and help in any way I can.
Hi,
ReplyDeleteThank you for this informative post.
I am keen to buy the Skarsta desk but worry my knees may make contact with the main beam when lowered to sitting height. Could you tell me the height and depth of the beam? Also, did you place the frame centrally beneath the other desktop? I wonder if drilling holes an inch or so further back may offer more leg room without compromising stability?
Many Thanks
With the foot pads / levelers at their minimum height on a hardwood floor I have just under 25 inches (63.5 cm) from floor to the center beam.
DeleteThe center beam is slightly over 14 inches (35.56 cm) from the edge of the desk.
Personally, I am ~ 5' 9" (~ 1.75 m) tall. And I use a riser I built to keep my knees at a 90 degree angle while sitting at the desk. My riser is nearly 3 inches (7.62 cm) tall and I have no problem with my knees.
I doubt that drilling holes an inch further back would affect stability unless you plan to lean or put a lot of weight on the leading edge. But, assuming you are putting monitors on the now shortened edge this may actually help stability.
Let me know if you have any further questions.
Hello there sir,
ReplyDeleteI loved the explanation. I have only one question:
I dont have any pre drilled table top to guide me. How can I drill my own table top so that it will be an exact match with where the holes was supposed to be? Could I make it so that I just put the base on top of the table top (upside down) and deduct where it should go by eye? I am really struggling here..
This comment has been removed by the author.
DeleteI would recommend one of the following:
Delete1) take measurements of the fully assembled table support and then recreate said measurements on the tabletop; or
2) flip the fully assembled table support on to the bottom of the table top and make your markings.
The reason I would have the table support fully assembled is just in case there is any variance in it being off square when assembled.
Option 2) will be heavy (the fully assembled table support is heavy) but should result in the most accurate drilling results.
I hope it turns out well!
This is great work! Congrats!
ReplyDeleteMay be you could address my query: what is the shortest length that the desk can have? i.e. I bought the 120cm x 70cm one. Do you think I can make it 100cm by 70cm?
I took a tape measure to my desk.
DeleteI have the larger size, the minimum desk width is ~140 cm.
It looks like if I used the inner holes the minimum desktop width I could place on the desk is 116.84 cm.
The minimum depth with my legs is ~69 cm.
All of my measurements are based off the top of the legs. If you look at image 9 and 13-15 you will see how the leg base has a lip where the table top mounts. I would say that the width of this lip is what determines the minimum width of the desk.